Making a magic ring
To make a magic ring, complete the following steps.
Step 1
Make an adjustable loop.
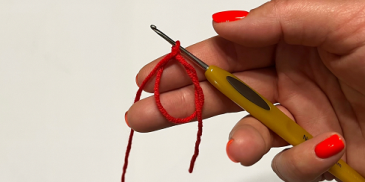
1. Place the tail of the yarn in your left hand, with the end pointing towards you. Loop the yarn’s working end (ball end) around your first two fingers.

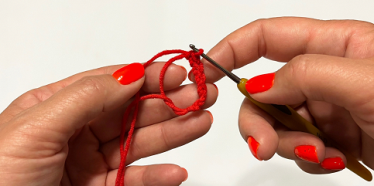
2. Cross the working end over on top of the tail end and to the left. Slide the hook under the bottom yarn strand.

3. Yarn over and pull up a loop. When pulling up, rotate the hook up towards you.

4. Yarn over and pull the yarn through the loop on the hook. This completes one chain. It does not count as a stitch.

5. The magic ring is finished.

Step 2
Work 6 stitches into the magic ring.
1. Work over both strands: the loop and the yarn tail.
2. Insert the hook into the center of the ring and pull up a loop. You should have 2 loops on the hook.

3. Yarn over and pull the yarn through both loops on the hook. This is the first single crochet.

4. Keep making stitches into the magic ring until you have made 6 of them.

5. Hold on to the stitches with the fingers of your right hand. With your left hand, pull the yarn tail to close the ring (like a drawstring bag). The turning chain and the last stitch of the round will come closer together. Adjust the ring so that there is no hole in the middle and the work is flat.

6. If the center ring loosens as you work, pull on the yarn tail again to tighten it back up. Once you weave in the end, it should stay in place.
For a video recording, go to: How to Crochet a Christmas Gnome Guide Videos.